
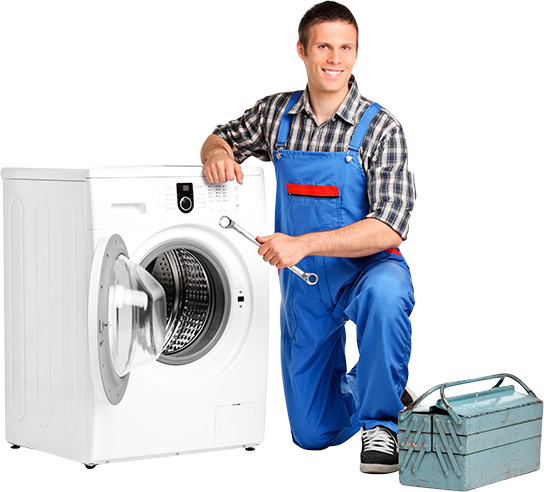


INSTALLATIONS
INSTALLATIONS
Are you in the process of purchasing a new appliance and want the installation done correctly? Need to install a new appliance but not sure how? We are here to help you. Our technicians can install your appliances from start to finish.
WARRANTY SERVICE
We warranty only that the parts installed by us will perform satisfactorily under conditions of normal usage for a period of ninety days after date of repair. Except as expressly provided above, there is no warranty or guarantee of merchantability, or fitness for a particular purpose or of any other kind, expressed or implied, with respect to the services performed or parts furnished by us, and we do not make any guarantee with respect to any other parts. If repairs later become necessary due to other defective parts, they will be charged separately.

QUALITY ASSURANCE
We pride ourselves on the quality of the job as defined ``the maintenance of a desired level of quality in a service or product, especially by means of attention to every stage of the process of delivery or production``

EXPERIENCED TECHNICIANS
Our technicians are experienced in all facets of appliance repair. With a cumulative knowledge base exceeding 45 years. Our technicians have a solid reputation amongst their clients and within the appliance repair industry. Their many years of expertise allow them to correctly diagnose any issues, clearly understand the correct parts required, and quickly and carefully repair the issue.

5 STAR SERVICE
Our staff will typically go above and beyond what you as our customer expects. They will take that extra step to ensure you know that they understand what you are going through and that they want this to be a pleasant experience.

OVER THE PHONE SERVICE
Give us a call, if a technician is available there is a good chance we can diagnose issues over the phone, in some cases saving you monies on a service call. If the issue is an obvious one you are a step ahead and have saved already.
You’ve got questions, we’ve got answers.
In general, our technicians will never push you to repair an appliance after it’s past it’s prime. Each and every appliance has a lifespan, and maintenance past this age will take longer, cost more and be more difficult. If your appliance is failing every few months consider a replacement instead of a repair. Our technicians will gladly assist you in determining which option is more cost-effective.
A broken or problematic dishwasher can really throw a wrench in your daily routine. From worrying noise to leaks or still-dirty dishes, you may be thinking about calling for dishwasher repairs. But before you pick up the phone, stop and make sure the problem isn’t something you can easily solve.
These are things you can check for at home.
-
Door Latch – Check the door latch. See if the door clicks shut when you press it closed. If the click is absent, this could explain why your dishwasher won’t start or isn’t sealing.
-
Dishwasher Door – If the dishwasher door doesn’t close correctly, then the dishwasher won’t start.
-
Door Handle – Check the door handle to see if it is whole and functional. Does it depress when you press it? Does it actuate the door latch? If not, there may be something obscuring or sticky that can be cleaned away.
-
Door Seal – Check the gasket seal around the door. If it is hard or twisted or otherwise damaged, this may be the cause of your problem. Consider washing, rubbing with petroleum jelly, or replacing if there is anything wrong with the gasket.
-
The Spinning Arms – The spinning arms of your dishwasher are its primary way to wash. If your dishes aren’t getting properly clean, or if you’re hearing clunking sounds, it may be the spinning arms.
-
Obstructions – Check for anything keeping the arms from spinning. Do this every time you load the dishwasher to make sure that nothing sticks up or sticks out into the path of the spinning arms. Just give them a spin and see if anything’s in the way.
-
Clogged Nozzles – If your house runs hard water, the nozzles can clog with chalky minerals. If water isn’t spraying, or if you see the residue, wipe down your nozzles with vinegar. Vinegar melts the residue. Running the dishwasher with a cup of vinegar in the top tray.
-
The Drain and Filter – If the wash water can’t drain, then the food particles can’t wash away and the dishes won’t get fully clean. You may also notice puddling or food debris in the bottom of the dishwasher.
-
Debris – Clear any debris in the bottom of the dishwasher. Dishwashers can usually deal with small particles but large things like lettuce leaves and plastic can blog your dishwasher’s ability to drain.
-
Filter – The dishwasher filter is underneath a cover on the dishwasher floor. Pull it out and clean it in the sink. It may have become clogged or damaged.
-
Drain Hose – Check where the dishwasher drain hose connects underneath your sink to be sure the hose is clear and is not leaking.
-
Power Supply – Finally, make sure that your dishwasher is getting power if it has been unresponsive. Your dishwasher’s breaker may have blown or the plug may have shaken out of the outlet.
-
Breaker – Finally, check to see if the dishwasher’s breaker has been thrown. In most cases, flipping the breaker off and on should restore the power.
-
No water
Make sure you get water to the dishwasher. Check to see if the water shut-off valve (located under the sink) is open. If you get water to the dishwasher, but there is still no water inside during the fill cycle, the problem might be with a faulty water valve (located at the bottom of the dishwasher, behind the kick panel, on either side), in which case replace the water valve.
-
Not enough water
If there is not enough water, the dishes would not get cleaned. This could be caused by a partially closed water shut-off valve (located under the sink), or a faulty dishwasher water valve (located at the bottom of the dishwasher, behind the kick panel, on either side).
-
Clogged spray arms
There is usually two, sometimes three spray arms in a dishwasher. Make sure there is no debris blocking the holes inside each spray arm.
-
Water temperature is too low
To get the best results, the water has to be at 120 degrees Fahrenheit when entering the dishwasher. If home water is good, there is a possibility that the heating element (if equipped) is un-serviceable or not getting proper voltage from main control.
-
Not enough soap
A lack of soap or the incorrect soap type can directly effect cleaning. Have you recently change brand or soap type. Old powder soap loses its cleaning ability as it ages.
-
Not enough water pressure
Main motor may be defective not giving a wide spread coverage of water. Place the spray arms in a forward position, start running a cycle, open door to see if spray arms have moved.
Proper Voltage – If your dryer won’t heat up, it’s possible that it is not being supplied with the proper voltage. Here are three ways to make sure power is getting to your dryer:
-
First, make sure your dryer is plugged in.
-
Check the circuit breaker panel to make sure all the circuit breakers are in the correct positions. Cycle the breaker off and on.
-
Check to make sure no fuses in your fuse panel are blown. Any of these could explain why power is not getting to your dryer.
Heating Element
It is possible that your dryer isn’t heating because its heating element is defective. Heating elements are non-repairable but they can be replaced.
Thermal Fuse
Another possible cause for a dryer not heating up could be attributed to a faulty thermal fuse. Once a dryer’s thermal fuse has blown you will have to replace it. A blown fuse is usually related to an airflow blockage.
Thermostat
If any of your dryer’s thermostats have become defective, they could be the reason that your dryer is not heating. Like many of the components these can be replaced.
Timer
A defective timer motor could also cause your dryer to not heat up. The timer is probably the least suspect part but they have been known to fail.
Main Control
On the main control are relays that could fail. This would require a technicians experience to determine.
Note: Normal drying time for a dryer is about 45 minutes (some may take up to an hour).
Venting
Make sure the dryer vent hose, as well as the rest of the vent duct, is not clogged.
Unless regular maintenance is performed, chances are there is a lot of lint accumulated inside the dryer. This might affect the drying time and could be a fire hazard. Make sure to have your dryer cleaned regularly. Because this might involve taking most of the dryer apart, it is recommended to have a qualified appliance techniciaan perform this task.
Thermostat
There are a couple of cycling thermostats inside the dryer. If one of them breaks down, it might affect the dryer’s performance. Replace the defective thermostat.
It is highly suggested that microwaves be service/repaired by a skilled technician. Your microwave has a part called the high-voltage capacitor which actually holds onto dangerous amounts of electricity even after the microwave has been unplugged
Touchpad control panel doesn’t work
-
Controller is confused –A power surge or random action may have resulted in the controller’s program ending up in an infinite loop. Remove power plug for 5 minutes and re-plug
-
Defective Interlock switches – This can result in the controller thinking the door is open.
Turntable won’t turn
-
If the carousel inside your microwave won’t turn when you run it, the small motor that operates it may be broken or there is a problem with an interlock switch.
- Light bulb socket & main control board
If your microwave light bulb is not working after the installation of a new bulb, check the light socket as well as the wiring to ensure they are properly operating. If these sources are functioning properly, the next step is to check for a faulty control board as a possible root cause to your microwave light bulb malfunction.
- Inverter or magnatron (Panasonic)
If your microwave runs for a few seconds and stops. It is an internal electrical component that has failed. This is not a DIYer fix due to high internal voltages. - Touch pad/Control panel
Although uncommon for this issue, symptoms are usually that the display and some buttons are working properly; however, when selected some buttons are not functioning. If this is the case the touch pad will need to be replaced.
-
Main control board
If the display on your microwave has gone out completely this is usually a sign that it is a malfunctioned main control board. To correct the issue the main control board would need to be replaced.
-
Display board
A display board can either malfunction completely or partially, causing two separate results. If the display on the unit has completely gone out, this can be attributed to either a bad main control board or display board. On the other hand, if the display has only partially gone out, this is usually a sign that the display board is defective and will need to be replaced.
-
Interlock switch
If your microwave is turning itself on, the most common reason is a faulty interlock switch. This is usually the first thing to malfunction that could cause this issue. If the interlock switch is bad then it will need to be replaced.
-
Main control board
If your microwave is turning itself on and the interlock switches test good, the probable cause is the main control board. If the control board is defective it will need to be replaced.
-
Waveguide cover
Sparking and arcing in a microwave can be caused by a damaged waveguide cover.It is usually located on the inside of the microwave, and is approx. 1″ x 3″ in size. If the waveguide cover is burnt or will not stay in the proper spot it will need to be replaced. There are instants where a damaged waveguide cover has allowed excess heat from magnatron to disfigure the metal wall, this cannot be repaired.
-
Cavity paint
If sparking or arcing in the microwave is visible on the side walls, the paint covering the metallic areas could have worn off or chipped. This can possibly cause pitting in the side walls or ceiling. In most cases a successful repair can be accomplished.
-
Open lever
Check your microwave lever to determine if it is damaged. If it is broken, simply replace the lever to get your microwave door fully functional again.
-
Door spring
Responsible for keeping downward pressure on the door hook, the microwave door spring can begin to malfunction. If this part is broken and prevents you from opening your microwave door, replacement is necessary. On some models the whole door will need to be replaced.
-
Door latch
The door latch manipulates the door hook to keep the door closed for safety, this could be broken. If broken, the door could become stuck in the locked position.
-
Door hook assembly
If your microwave door will not release properly, the door hook could be damaged. Located inside the door, the door hook is made of plastic and prone to breakage with extended use or age.
-
Button or button spring
If the microwave door will not open, it could be an internal failure of the button or button spring. If it is determined that either of these parts is the source, both are replaceable and it is recommended that they be installed at the same time.
-
Handle actuator
If the microwave door will not open the plastic handle actuator could be broken. Connected between the door button and the door latch assembly, this plastic part could become damaged and brittle over time, which makes breaking inevitable. This part would need to be replaced.
Inaccurate Temperature
If you believe that the display on your oven is lying to you about the temperature, it can easily be checked. You simply need to put an oven-safe thermometer into your oven on a cook cycle and check its reading. If it doesn’t match up with the temperature set, then your oven temperature is inaccurate. After confirming the temperature is uneven, this is the time where you will want us to diagnose the problem.
Causes for Uneven Oven Temperature
An inaccurate temperature can be caused by everything from a problem with the temperature sensors to the heating elements in your oven. However, potential issues come with symptoms, and sometimes even a visual inspection can help you find the specific problem so you can fix it quickly.
Igniters
In the case of gas ovens, you could have a problem with the igniters. Dirty or malfunctioning igniters may be slower to ignite or not ignite at all. This means the temperature of the oven is allowed to drop well below what it should be before the igniters reignite to stabilize the temperature. Alternatively, your oven temperature could be too high if a malfunctioning igniter is not shutting off correctly.
Bake Element
For electric ovens, the uneven temperature can often be attributed to a faulty bake element. It is important to remember that most ranges have two elements, one above (broil) and one below (bake), some have a convection element that is usually not visible. You should check both with a visual test to look for cracks or blistering. If you cannot see any obvious signs of wear, allow the oven to heat up. The elements should glow red, if they do not, they are either faulty or there may be a relay/solenoid issue. Your bake element can also be tested for continuity if the visual tests fail.
Temperature Sensor
Part of your oven’s thermometer is the temperature sensor. This piece is a little metal bar that extends into your oven and takes readings of the temperature inside. It will send those readings back to the control board so the oven will know when to turn on and off the heat. You may want to check to see if it is damaged. Sometimes it can get bumped and may even end up touching the sides of your oven, leading to incorrect temperature readings. It is important that if the sensor is bent or damaged that you replace it. Trying to bend the sensor back is unlikely to fix the issue and more likely to cause more damage to it instead.
-
Evaporator coils are frosted over
If your issue is that the freezer is cold but the refrigerator is not as cold as it should be, the first step is to check the defrost system for problems. A key indicator in determining if perhaps you have a refrigeration defrost problem is visible frost on the evaporator coils. If your unit has excessive frost this could point to the defrost heater assembly, the defrost control, and/or the evaporator fan motor being faulty.
-
Damper (on some models)
If your issue is that the freezer is cold but the refrigerator is not as cold as it should be, the damper door could be broken or jammed. The damper is a door that opens and closes to allow cool air to flow from the freezer into the refrigerator unit, and if it fails to operate correctly, not enough cold air will enter the refrigerator to keep it cold. The damper can be replaced if it is no longer operating properly.
-
Thermistor
If your issue is that the freezer is cold but the refrigerator is not as cold as it should be, the thermistor connected to the control board might be defective. The thermistor is a sensor that examines the temperature inside the unit. If the part is defective, the refrigerator could not cool properly.
-
Temperature control board
The temperature control board could be at fault. The temperature control board distributes voltage to the fan motors and compressor to keep them functioning. This board is very often misdiagnosed as the cause and it is recommended to proceed with the troubleshooting process of elimination prior to replacing this part.
-
Defrost thermostat
It could be that the defrost thermostat has failed. In order for the defrost heater to activate to melt away any excessive frosting on the evaporator coils, the defrost thermostat must sense that the temperature is cold enough to activate the defrost heater. Without this continuous cycle, the frost will excessively build up on the coils and prevent proper air flow inside the unit. The defrost thermostat can be checked for continuity with an ohm meter.
-
Main control board
The main control board acts as a “brain” for the unit, controlling the defrost cycle, compressor, and run time. This board is very often misdiagnosed as the culpable cause and it is recommended to proceed with the troubleshooting process of elimination prior to replacing this part.
Water Flow
Water flow from your house supply should be about 20 psi. If your refrigerator is the one to blame instead of your supply’s water pressure, it could be that the water tube is frozen in the door, or a common issue is the water inlet valve. The water valve opens the water supply to the dispenser so if it is clogged with minerals or fails to open or close, it could be malfunctioning and needs replacement. A clogged water filter can also cause this issue, change the filter as per manufacturers recommendations.
Noisy Ice Dispenser
If your ice dispenser is making noise but not producing ice, it’s possible that ice has built up on the bottom of the bucket holding the ice. Make sure you dump out any excess ice to clear the bucket. However, if the ice dispenser does not produce ice and no ice is being made inside of the fridge, you may have a water inlet valve issue, filter issue, inoperable timer, or main control failure. Other than changing the filter the other issues would require a visit from one of our technicians.
Many factors may tie into why your fridge is noisy. Food stacked in the unit to close to air vents may be affecting the fan motor and causing it to run less efficiently. It could also be related to issues with a failing compressor. There are very few DYI diagnosis that can quickly determine the problem, it is suggested to contact our office and make a booking.
Although DIY appliance repair videos might say otherwise, it’s best to discuss the problem with one of our technicians and have us inspect your fridge to find the best solution. The long and short of it is that only a qualified refrigeration technician has the proper equipment to recharge you unit. Having to recharge a refrigerator means that unit has a leak and will soon fail. It is best to repair the unit before the compressor fails, making the unit, in most cases, uneconomical to repair.
There can be a number of reasons for smells.
-
Washer – clogs, resulting in an unpleasant odor. Drain tube place too far down the drain stand pipe will cause a build up of debris. You may be leaving clothes inside too long, resulting in a mildew smell. Front load machines should have the door left open between uses to lessen the build up of mildew. Drum support may be broken and the drum is rubbing on the door gasket.
-
Fridge – Usually caused by a temperature issue or a problem with uneven cold distribution. There are a number of reasons, which we can easily help you with. A simple diagnosis is a phone call away.
-
Dishwasher – Frequent cleaning of the filters will lessen the chance of food debris buildup. Open the door every now and then to dry out the interior.
There are a number of reasons your washer won’t drain or spin:
-
If the door lock mechanism is faulty the unit will not spin, this is a safety feature. Normally the unit will fill, may even agitate but will not drain or spin.
-
Another no spin cause is a bad transmission or gearcase. If any oil is present under the washer or on the transmission it will need to be replaced.
-
Some Maytag, Whirlpool, Amana units have coupler between the motor and gear case, this part is designed to fail should problems within the gear case or motor have occurred.
-
Filter is clogged, some units have a filter system behind a door on the lower front of the washer. Remove the door, use the drain hose to drain water, then remove and clean filter.
-
Some units have a coin trap located in the pump to tub hose, this is not an easy repair for the DYI’er.
-
Drain pump is unserviceable, you will test for voltage to pump to determine if the control or pump are at fault.
-
Main control is unserviceable, we will normally carry out a manufacturers diagnostic test to pinpoint the faulty component.
-
Drain hose is clogged (placing the drain hose more than 12″ into the drain stand pipe will cause a debris build up in the hose, restricting water flow. This debris will also become quite odorous.
There are a number of common leak issues on washers:
-
Door gasket (boot or bellows) has a rip or deformation and not sealing correctly. A ripped gasket will general leak inside the washer and water will be found coming from underneath.
-
Water inlet valve has failed. If washer keeps filling and won’t stop the valve has failed. If water is evident on the floor you can determine if the valve is leaking by removing the top and checking the valve when it is in operation. 2 or 3 screws can be found on the back of the top, typically after removal slide the top to the rear.
-
Drain hose leaks, are caused by the drain hose rubbing on the washer frame or wall. The leak will become worse as time goes on.
-
Inlet hose leaks. Generally rubber hoses have short life span (suggest changing to steel braided hoses). Check the connection at the house and back of washer.
-
Water leak from the detergent drawer, check that the detergent being used is being used as per directions/manual. Be sure the detergent in the detergent drawer does not go past the marked max line. If washer detergent drawer leaks water, use less detergent. Always be sure that when running the washer the detergent drawer is fully closed.